Sunday, March 6, 2011
Picasso Portraits
I have seen this lesson on several blogs. Students draw abstract portraits based on Picasso's. They begin by drawing a circle and draw a profile line down the center. We discuss how he shows different points of view at once and how to draw features from the front and side. Students then divide up their drawing using a large figure 8 and horizontal and vertical lines. Students use different colors and patterns to fill in the spaces.
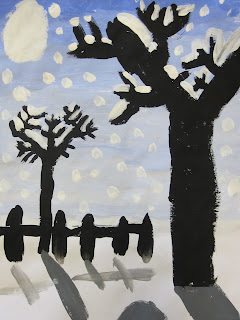
Tinted Winter Tree Silhouettes
In this lesson we begin by discussing what a tint is. Students choose either red or blue paint to use for their background and are given a small cup of white paint. Little by little they add their color to the white and paint in layers from bottom to top, getting darker as they go. Once the background is dry students use black paint to add silhouettes of trees showing distance by painting the tree in front larger and the tree in back smaller. Students can add any other details in silhouette- a fence, animals, person... They then use white paint to add a moon and snow falling in the sky and on tree branches. To finish off their painting they mix gray and add shadows under all their objects.
Legend of the Indian Paint Brush
We read The Legend of the Indian Paint Brush by Tomie DePaola. We brainstormed different images that we saw in Little Gopher's paintings. We began by painting a 12x18 piece of paper in a rainbow pattern of stripes. When that was dry we drew scalloped lines around the edges and cut them out to make it look more like the animal skins we saw in the story. Students then used oil pastels to draw Native American scenes.
Basket of Apples
This was a fall lesson that I did in the beginning of the year with first graders. We began by weaving our baskets and gluing them onto the bottom of a sheet of paper. They then used markers to draw two curved lines to make a handle. The last step was using halved apples to make prints in the baskets. we talked about what colors apples are and painted on the flat side of the apple before pressing onto our papers.
Op Art Opposities
This lesson follows up a lesson about Op Art. We spent some time looking at and discussing Op Art and optical illusions. Students created two drawings of opposite images. When the drawings were colored they measured 1" vertical strips across both drawings. Students cut one strip from one drawing and glued it onto a new sheet of 9x12 paper. They then cut the first strip from the second drawing and glued it next to the strip from the first drawing. They continued cutting and gluing one strip at a time from each drawing. Once all the strips were glued down they folded their paper accordian style. When opened up each opposite can be viewed from a different angle. The next time I do this project I think I would try using images that show movement so that when you look at the drawings it appears that they are moving.