This lesson focused on the ideas of composition, balance and rhythm. We talked about how many artists have made art works about musicians and musical instruments. We looked at different examples and then talked about creating our composition. Students had to include 4 items in their drawings- a keyboard, an instrument of their choice, a music note and a 4th musical object of their choice. We drew on black paper and colored with oil pastels. We reviewed blending oil pastels and outlined drawings with black when finished. These were really fun, bold projects.
Showing posts with label oil pastel. Show all posts
Showing posts with label oil pastel. Show all posts
Saturday, June 11, 2011
Saturday, June 4, 2011
Marc Chagall Inspired Flying FIgures
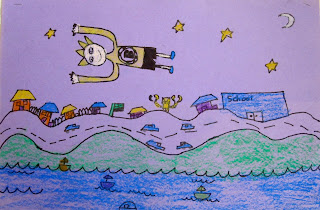
This is a lesson I did with 2nd graders. We looked at several of Chagall's paintings and discussed how they looked "dreamy" and what in particular made them look that way. A common theme was flying figures. We folded our papers in half- students were instructed to draw a town or village on the bottom half of the paper. We drew wavy roads to make it look more dreamy and kept our details small so they would appear to be far below. On the top half of their papers students drew a flying figure (we were going for a self-portrait) with a night time sky. We talked about how it might be easier to turn your paper vertically to draw the figure and how to draw stars. Students chose their color of paper and used oil pastels to color. This is a project I definitely plan of doing again- the results were really whimsical.
Labels:
2nd grade,
Artist: Chagal,
oil pastel,
self-portrait
Monday, May 23, 2011
Updated Thiebaud
Here is a different version of a Wayne Thiebaud project. We specifically looked at his cakes and discussed what types of 3D shapes we saw (cylinder, triangular prism...) as well as his straightforward compositions- rows with shadows and a blank background. I showed students how to draw a 3D cake slice and a 3D cake with a slice missing. I showed them step by step (and provided some oval tracers) and then supplied them with the same instrucions written/drawn out as a reminder. They did a great job with these! We used oil pasted to draw details and painted in the larger areas with tempera cakes.
Sunday, March 6, 2011
Legend of the Indian Paint Brush


We read The Legend of the Indian Paint Brush by Tomie DePaola. We brainstormed different images that we saw in Little Gopher's paintings. We began by painting a 12x18 piece of paper in a rainbow pattern of stripes. When that was dry we drew scalloped lines around the edges and cut them out to make it look more like the animal skins we saw in the story. Students then used oil pastels to draw Native American scenes.
Labels:
1st grade,
Native American,
oil pastel,
painting,
Seasons: fall
Sunday, January 16, 2011
Winter Landscapes
,

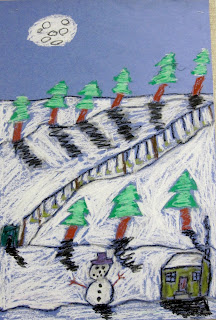
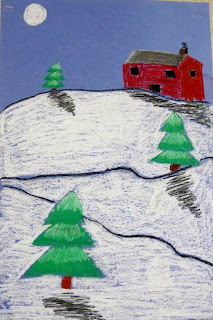
5th graders used oil pastels to create winter themed landscapes. We reviewed lots of vocabulary- landscape, horizon line, foreground, middleground, background... Students could include whatever winter elements they chose in their landscapes but each object had to have a shadow (colored in the same direction and away from the light source) and they had to make sure that they paid attention to atmospheric perspective- objects in the distance are smaller than objects that are closer. These came out great but we blew through white oil pastels!


5th graders used oil pastels to create winter themed landscapes. We reviewed lots of vocabulary- landscape, horizon line, foreground, middleground, background... Students could include whatever winter elements they chose in their landscapes but each object had to have a shadow (colored in the same direction and away from the light source) and they had to make sure that they paid attention to atmospheric perspective- objects in the distance are smaller than objects that are closer. These came out great but we blew through white oil pastels!
Labels:
5th grade,
drawing,
landscape,
oil pastel,
Seasons: winter
Sunday, December 19, 2010
Modigliani Style Self-portraits


After learning how to do a self-portrait using proper proportions, 3rd grade students are introduced to the work of Amedeo Modigliani. I originally saw this project on www.artprojectsforkids.org where I borrow many of my ideas from. Students began by folding their paper in half vertically to get a fold right down the center. They then folded their paper horizontally in half, also folding the top half down to the center fold and the lower half up to the center fold creating 8 rectangles. These folds were used as guidlines. We looked at the works of Modigliani and discussed the proportions he used and why. They drew a narrow oval along the center fold in the top half of the paper, the neck was drawn in the next section and the upper body in the last section. After adding facial features and hair, drawings were traced with black oil pastel (these are done on black construction paper). We reviewed how to use oil pastels and how to blend them to create new colors. Students had to blend colors to create skin tone and hair color. The oil pastels on the black paper made the colors very vibrant.
Labels:
3rd grade,
Artist: Modigliani,
drawing,
oil pastel,
self-portrait
Sign Language Names


5th graders created sign language name designs. We began by discussing what a font was and viewing different fonts. They used oil pastels to write their name in different fonts and sizes all over a 18x18 piece of colored paper. They then traced their hands for however many letters were in their name and cut them out. Using a copy of a sign language alphabet students shaped their cut out hands into the signed letters of their name and glued them onto the background paper. They used sharpie to add details such as finger nails and knuckles.
Subscribe to:
Posts (Atom)


